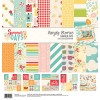
Hi everyone! It's that time again.... I have a new mini scrapbook to share with you! As you know, I am one of the Altered Art Design Team Members for Simple Stories and this month we are joining forces with Maya Road and combining ALL of the fabulous products for a fabulous blog hop!
What an exciting month to get not only adorable products from Simple Stories but to ALSO get amazing products from Maya Road which I adore! Of course I received a sweet mini chipboard album so I knew it was the perfect time to combine it with the new Simple Stories 'Summer Days' paper collection for an amazing mini scrapbook!
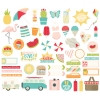
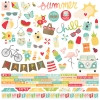
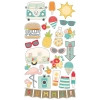
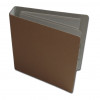
The Maya Road Recollection Chipboard Binder is a chunky little book with 4 tabbed chipboard pages. I decided to not add any additional pages to the album but made each of the chipboard pages interactive with the adorable 'Summer Days' paper, chipboard, stickers and Bits & Pieces! Wait until you see all the fun inside!
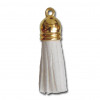
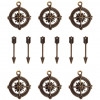
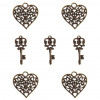
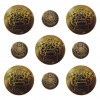
The cover of this fun and colorful Summer album is pretty much dedicated to the Maya Road products I received! I used a large Ken Oliver metal button to create a charming 'knob' for the front complete with some hanging charms! I also made the long charm on the spine of the album using the sweet metal embellishments along with another tassel and a paper rose. These were attached to some jewelry chain with jump rings and then secured to the album from the inside with a twine knot.
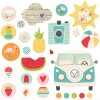
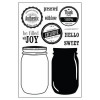
I used the adorable mason jar stamp and die set to create a mini mason jar shaker that I filled with small stickers from the 'Summer Days' collections for shaker elements! For extra shine, I added small glittery hearts and stars! Too cute! The die cuts a whole mason jar so I used an exacto knife to cut the center out and then covered it with acetate.
Of course, no mini album of mine would be complete without a pocket! I created this large one on the inside front cover by using two of the 4x6 vertical elements cut to size and angled for easier use! Even though these elements are already super cute, I added on more with a sticker, chipboard flowers and candy dots!
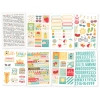
When I saw this Summer Bucket List on one of the 4x6 cards, I just knew it would be on the first page of this album! Who doesn't make a bucket list for the season?! For a colorful and interesting background, I made some mini frames from the fun patterned papers and added a sticker from the 4x6 sticker pack to the inside of each. Super cute!
I cut a section of the 4x6 vertical elements and scored them before folding them back and forth to create this fun pull-out section that is all ready for Summer photos. I took two decorative brads, snipped off the prongs and adhered them together for a small tab and embellished the pages with cute pieces from the collection!
A large fishtail flag from the horizontal elements for this page! You could add some small photos to the front and then it lifts up to reveal more photo spots and charming embellishments! You can see some of the 'Summer Days' washi tape on the side of this page. Such a colorful addition!
For this page I made a large pocket from a square of the 4x4 elements that was cut to fit. I used two more of the 4x4 elements to make a double sided slide out tab that can hold pictures or mementos!
Another pull-out on this page, made with the cute 4x4 element cards. I used the smaller stickers to create the tab for this one and also to decorate these smaller pages! There is a rectangular pocket at the top of the page that is perfect for holding smaller journaling cards or photos!
Since there are so many super cute 3x4 journaling cards, I couldn't resist making a double flip book! Each section has a fun front and then space on the back for photos! I added in lots of the adorable chipboard and stickers to embellish this page!
More cuteness on the last page with a large frame ready for that perfect Summer photo! I cut 1.25" x 1.5" chipboard rectangles for the frame and covered them with the patterned paper before adding stickers, metal embellishments and enamel dots! A great way to end this super cute Summer mini album!
Thanks for checking out my blog! Bee Happy!!
Supplies Used:
Martha Stewart border punch








No comments:
Post a Comment